Tuesday, December 7, 2010

finally, an overview of the wedding.

how the wedding went:

First some of my favorite girls helped me get ready.

before we can get started, some important people had to be seated: Then our amazing attendants came in: And because its VERY important for brides to walk on flowerpetals before they get married:

Then as I have always dreamt of:
My 2 big brothers walked me down the aisle. This moment in my memory makes me tear up most times I think about it. Even before it happened. The morning of the wedding, I couldnt sleep, I laid in bed imagining the wedding and this moment made me cry like a, well bride on her wedding day. I still get choked up looking at these pictures.

2 more of my darling neices were my train carriers.


I met my Groom, my Love at the front for a few gushy words... Blah Blah Blah....

After the ringbearers brought up the rings, we gave them to eachother:

And because by then we couldnt wait any more, we kissed!


and then we loved happily ever after... Well... not until we had cake anyways

A few more details,

We re-entered the room to "His Cheeseburger" by VeggieTales. Its the most romantic song ever.

We served basic food, the highlight was over 400 hand made cupcakes made and decorated by me and my wedding fairies. Topped with a jumbo cupcake made and decorated by my great friend, owner of Pink Princess Cakes.

My Something Old New Borrowed Blue:

  • My Love had given me Citrine Earrings for Christmas, not very old, but aside from the veil, it was the oldest thing I wore.
  • Both my dress and matching necklace to the earrings were new, it was my wedding gift from my now husband.
  • I borrowed my mother's veil, altered slightly to add my colors.
  • My mom used scrap fabric from my bridesmaid's blue dress to make me a garter belt.
  • And I had a sixpence in my shoe, my father in law gifted it to me for good luck.

It meant a lot to me to have my entire immediate family involved in the ceremony. Family is important to both my husband and I. This is the 23 (going on 25) of us. My Parents, Siblings, Siblings' spouses, neices nephews, my Husband and I.

The wedding was held in our home theater/ shop. The weather was unpredictable that day, and we were very concerned that it would start to down pour right when I had to walk out my upstairs door and down the deck and through the building for the grand entrance. Luckily, the downpouring stopped about an hour before the wedding, so I didnt have to walk down the inside stairs: it was hard enough to walk with my brothers holding my arms, me and stairs dont like eachother much.

My Dream came true on 10-10-10 and everyday I imgine that I couldnt be happier, and everyday, I find that yesterday, I was wrong.

Thursday, November 25, 2010

place cards and labels.

Having 12 children in the wedding, and 11 of them with assigned seating, I decided early on to make name tags for their chairs at the ceremony, so they know, and adults around them know, where they are to sit.

As added incentive, I stapled a dollar bill to each of the children's name tags. I talked about the dollars at the rehearsal dinner and got all the kids excited to have their dollars, IF they behave the next day. All the kids did amazing, also, our photographer knew about the dollars and reminded them when we were taking pictures.
(AnnaLisa showing off her dollar)

The adults also got name tags:I also needed to label the cupcake flavors and coffee/hot water/lemonade/fruit punch etc. I already had the stamps and the ink was left over from my napkin rolls.
I had originally bought a print-your-own invitation kit, but after Staples couldn't print on them, I didn't use them for the invitations.

The invitation cards were a good size for the place cards and other various labels.
The RSVP cards in the kit were perfect size for my cupcake flavors labels. (still looking for a better picture of the labels) They were supposed to be cut in half when used as RSVPs but i found folding them in half worked well for little tent-stands.

I also stamped the note for my signature frame, bathroom door signs, and goodie bags in the same way.


COST OF PROJECT:

  • Invitation kit: Leftover, but was $3.97 on clearance at JoAnn's, envelopes were used for invitations and thank you notes.
  • Stamps: already owned, but were like $5 on clearance at a local scrapbooking store
  • Ink: Leftover from other project, but were $4/pad at JoAnn's and Michaels
  • Dollars: $11 + $1 because my nephew Shua ripped his during the reception and I replaced it.

Monday, November 22, 2010

Flower girl baskets.

I always knew this would be an easy peasy craft project. and I knew I didn't want it to cost a lot of money.

First i thought i would just get some $1 baskets from thrift stores, i love thrift store shopping because it can be better for the environment, (i talked about that in this post) but i decided i wanted the baskets to all match, and having 4 flower girls, i thought it would be difficult to find 4 matching baskets, used. After Eater, I bought 4 plain blue baskets.

I had just enough orange ribbon to wrap around each one and twist around the handle. then after not having enough ribbon to make bows, and not really knowing how to make bows easily, I decided to take some silk flowers I had and hot glue them on. I glued the first one on, but it wasn't centered, so i added 2 more. The flowers all started the same size, to make 2 of them smaller, i pulled the little plastic thing off the back, removed 1 and 2 layers of petals and put the plastic thing back on. The smallest flower was attached carefully to the handle so that the handle would still pivot, making storage easier.

The baskets were filled with cut up silk flowers. I would have needed 2 $10 boxes of petals, but i did the math and i got more than enough flower petals with 4 bouquets of cheap silk roses in 2 colors. Plus, my sister, who is helpful but not super crafty, needed an easy job on craft night, so she sat and cut the petals off the roses.

COST OF PROJECT = $21.75 for 4 baskets and petals.

  • Baskets 4 x $2 = $8
  • Ribbon: 1 spool for $1
  • Orange silk flowers: $0.75
  • Petals: 4 bouquets x $3 each = $12
About the flower girl dresses, they were on Clearance for $9 each at Wal-Mart. Then I decided to make a collar for our dog, so I went back to buy another, and it was only $5,
Knowing her temperament, Annie was not part of the ceremony, I just made the collar for her for fun. All I did was cut the dress just above the ruffle, and folded a wide seam, hot glued the seam shut into a sleeve, (like for a curtain rod) and slid her regular collar inside the sleeve. We got the jewel beaded leash at a pet store for her.


I told the parents the flower girls can wear whatever shoes they had already or that they wanted to get them so they wouldn't have to spend much, although $9 is pretty cheap for the dresses.

Cupcake Tree ~ revisited

I am so happy with my decision to do cupcakes and to display them in tiers like a traditional cake.


I took this, a naked Cupcake Tree:
and turned it into this:
read about the flavors here


what i did was take a few rolls of solid blue wrapping paper and wrapped all the peices, attatching with tape. Assembled all the peices. (super easy to assemble, btw) then we hot glued the orange ribbon around the edge of each tier. then, using double sided tape, my bridesmaid put paper doilies all over each level. The cupcakes were organized by flavor, and on the table under the stand, i put hand stamped signs for each flavor.


The top tier was a Big Top Cupcake. I have a lovely friend Tresha, who owns a cake decorating buisness, Pink Princess Cakes who came over with some other friends, and family members to help frost all the cupcakes. That day, I was going to bake the jumbo cupcake, but it didnt turn out (looked done, but was batter still on the inside, (thats what I get for not following directions) so, being as wonderful as she is, Tresha took the pan home with her and brought it back morning of the wedding. My only instruction was that i wanted it to look like a big cupcake, and my "bride and groom" topper idea was to make cupcakes look like a bride and groom.
This is what she brought, and WE LOVED IT:
it was super yummy too! since we cut into this cake for the cake cutting ceremony, we saved the groom and bride cupcakes for our 1 year anniversary.

ETA I have since used this cupcake tree 7 MORE TIMES! read about that here

Signature Mat, sharpies and mustard

never a fan of the traditional guest book, i knew i wanted to do something different. When i found 2 signature mats at Wal-Mart on clearance for $0.75 each, I decided that was what i was going to do.

First, i thought i would just do a little sign "please sign frame" note and put it on the table with the goodie bags. Then i was concerned with someone signing too close to the edge of the mat, that would be covered with a frame, so since we were doing well on budget (his parents offered to pay for the food sort of last minute), and since we will need to buy frames anyway, (we originally thought we would use wedding gift cards or gift cash for them, after), we decided, correction, I decided to buy some frames and put the mat in the frame for signing. The frames we bought had thinner mats in them, i swapped them out. Also, not wanting to have some sheets of glass just sitting someplace in my craft room, I decided to put the glass in the frame, under the mat, for the time being, so it would be kept safe, with the frames until after we get pictures printed.

To dress up the frames, since there wasn't a picture in the middle yet, i hand stamped the "please sign" notes for the picture openings. then just used a tiny bit of tape to hold it in place, on the back of the mat.
putting the note inside the frame worked well, because one of my groomsmen, or someone i don't really know who, took the frames from the welcome table during the reception to go to each table to make sure everyone signed it, which i was very happy about, and didn't plan on doing. Only thing, some one's hot dog signed the frame with a tiny spot of mustard... i will try to cover it or something.

COST OF PROJECT: $37.50

  • Signature mats: 2 x $0.75= $1.50

  • Frames: 2 x i think, $15

  • Pens: 2 (2 packs) x $3something

  • stamp and ink for note: leftover from Napkin Rolls and already owned

I gotta tell ya, I really like the Sharpie Pens, they worked very well on the signature mats, no smudging and I've been using them since the wedding, and they work very well. a clean bold ink. just don't leave the cap off, I made that mistake once, it dried out :(

Also, the note inside matches other signs I made, for the cupcake flavors, bathroom door sign, and place cards for the reserved table seats.

ooh goodie... bags

so i originally wasnt going to do goodie bags for the kiddos, but i love kids and was doing good on the budget and to-do list, so when i found a package of 60 mini card games like these:

for $8 at costco, i couldnt pass it up. i knew i had about 20 clear cellophane goodie bags leftover from another occastion and a big ziplock of small toys and goodies from other goodie bags and pinata, i decided to go ahead and make up goodie bags. each one had a card game deck, an orange or blue tootsie pop (we picked through the bulk candy bin at Winco for the wedding colors. 2 orange wrapped off brand peanut butter cups , a few little toys, a puzzle book, and a noise maker.

(yes my then-fiance thought i was nuts for including noisemakers, but i really wasnt worried about the noise, i trust parents not to let the kids play with them for the ceremony and wasnt worried about the reception. it was pretty casual. afterwards, i dont regret it at all, i dont remember anything negative about the goodie bags. )
i tied each bag up with ribbon, and put them all in a wrapped box lid. (some were wrapped different and were peanut free, with carmel cups instead of pb cups)
we ended up with about 10 extra. some kids got 1 at the RD and 1 on wedding day. i had gifts for all the 11 kids in my wedding, but my bridesmaid and groomsman brought their kids to the RD, and since they didnt have gifts, i gave them a goodie bag early.
since we didnt ask for exact RSVP #s I wasnt sure how many children would actually be there, but i went through the guest list and estimated if everyone brought their kids, how many i would need. i counted about 40, but since there were 60 card games, i planned to make all 60, but i only had 59 baggies.
even though i tied them with curling ribbon, it was easier to twist-tie them shut first, then add the
The bags were a big hit, and the parents were happy for the thought put into giving the kids wedding favors, no one missed not getting traditional wedding favors.

COST OF PROJECT: under $30 for 59 bags with lots of leftover goodies.

  • card games: $8 (i also saw the same things in smaller amounts in the halloween aisle at walgreens, but it was a better deal at costco, extras will be used for other goodies later.
  • baggies: i think, $2 for 50, with twist ties + some i had from before
  • candy: under $1o
  • other misc toys and puzzle books: under $10 the party aisle at walmart
  • ribbon: free, leftover from my Spring Wreath
  • box: free and recycled printer paper box lid
  • wrapping paper: leftover from Card Box and wrapping attendant gifts

Afterwards, I had quite the mess in my craft room and had to organize it, I undid the leftover baggies to store for future occasions. Possibly Christmas, since our budget wont let us get gifts for each kid individually.

Card Box

I made my own CARDS box. This ended up working very well, people knew right where to put the cards, it helped decorate the gift table, and we used it to store all the cards and very small gifts after the wedding.

after seeing lots of blog posts, forum posts and bio pages about card boxes, i decided i was NOT going to spend much money. i certaintly wasnt going to buy craft cardboard boxes at $7-$15 each. Mine was fashioned out of a printer paper box. My MIL brings these home from the office for organizing and storage. i wrapped both the bottom and top seperately. I cut a slit centered in the lower half of the lid with a craft knife. to clean up the edges of the slit, i tucked one peice of ribbon in the end of the slit, taped it from the inside and around the top. did the same on the other side. then added a length of ribbon, overlapping the first one above and below the slit. then wrapped the teal ribbon around the bottom lining it up with the top. i simply secured the wrapping paper and tape with simple scotch tape. I cut the word "Cards" out with my cricut and glue-sticked them on. The paper flowers,and rhinestone stickers were left over from my votive holder make over.

COST OF PROJECT: practically free but if i hadnt had the leftovers, would have been like $9

  • Paper flowers: leftover from other project, but the entire package was $3.99 at party depot.
  • wrapping paper: i think, $2.50 a roll at walmart. i also used it to wrap attenant gifts too.
  • ribbon: on sale at michaels for $1/roll. didnt use an entire roll
  • tape: was originally 3/$1 at dollar tree.
  • lettering: already had the paper in my scrapbook supplies.
  • glue stick: idk i had it on hand from way before
  • box: free and recycled!

Monday, September 13, 2010

Some of the Bouteneers and Corsages

Its common in our family, (and even if it weren't, I would want it) for parents, and grandparents to get bouteneers and corsages to wear at the wedding. I also wanted to honor my Brothers, 2 of which will be "giving me away" and my brothers' wives & gfs, since they are like sisters to me.

In addition to including them in the processional, they get corsages.

My Craft Fairies made the following:
For the Brothers:

For the dads, and grandma's long time boyfriend:

For the Sisters-in-laws:
These have the same kind of initial charms that the bridesmaids' bouquets have.

For the RBs and Jr. Ushers:
they will be wearing black tuxes with Royal Blue bowties. The Flowergirls will be wearing light purple, so we included purple in the boys' bouts. (its hard to see in this picure) The Jr Ushers' bouts are slightly larger than the RB's but otherwise match.


For the Officiant:
I forgot to take a picture, but its a silver rose with blue accent. His tux is black with silver bowtie and vest.

It may not be standard to include the officiant in the bouteneer wearing group, but he is an long time friend of Mikeys, and would have been a groomsman choice if he wasnt ordained.


Still to come: Groomsmen, Bridesman, Groom, Moms, Grandmas, Train carriers.

PRICE BREAKDOWN
it is difficult to decide exactly how to breakdown the cost, because the bouquets, bouteneers, corsages and other items are all being made with the same supplies. After all silk floral was purchased however i spent maybe $60. I will get Bouquets for 3 bridesmaids, 1 bride, 1 MOH, and 1 to throw. PLUS bouteneers for: 3 dads, 3 brothers, 1 bridesman, 4 groomsmen, 2 ringbearers, 2 jr ushers, 1 officiant. Corsages for 2 moms, 2 grandmas, 3 sister in laws, 2 train carriers, and it looks like i will have bunches of leftovers. So you do the math.

(Some) Bouquets are done!

I got supplies from http://www.efavormart.com/ I was very happy with price and quality. used in this bouquet, are Blue Calla Lilys, Orange Rosebuds , and Silver Headpieces . I bought the orange ribbon from Michaels on sale for like 0.20 a roll, the dangly bead things were left over from other weddings in my crafty family. We used floral tape from Michaels to bind the stems together.

My favorite part of the bouquet is the initial charms on each one. (this pic has an L) When I saw other bouquets with initial charms, or beads, or whatever, I thought if I could get each letter for like $1, it would be worth it. On our Preweddingmoon in Las Vegas, we went downtown to a super cheap souvenier shop and found these slide on charms for $0.50 each + stupid tax. I hadnt decided exactly who my bridesmaids would be at that time, but got some extra letter options for the undecided girls.
After deciding on my girls though, I found that I needed another L so my darling aunt, who works in retail, looked online and found me Dog Colllar Slide Charms that look the same as the ones I had already got. They offer your choice of 6 for 5.99 + 1.41 shipping. Because I had extra letters, I opted to add a letter charm to each of my sister in law's coursages (they were possible bridesmaids candidates) and I also wanted a heart charm for the throw bouquet, so I am ordering 5 letters and a heart charm. The extra letters will be for my Traincarrier corsages, and my brother's girlfriend, since she is like a sister-in-law also.
In the end I was very happy with the little charm letters better than taking apart a keychain (original idea), the slide charms were easy to add to the ribbon wrapped around the bouquets and the size fits the bouquet very well, anything larger would have looked out of place.

We have yet to make mine or the MOH bouquet's, they will be a little fancier than the one above. Mine will have both a star charm and a C.

Funny story, when my Craft Fairies were helping me with the bouquets, bouts and coursages, my darling fiance balked at the idea that all the girls got bouquets, we all insisted that theyre supposed to have them. He insisted that every wedding hes been in(8) and to(countless), the bridesmaids didnt have bouquets, only the bride. how crazy is that? after a quick FB poll, everyone replied that theyve never seen weddings without bridesmaid bouquets.

PRICE BREAKDOWN
it is difficult to decide exactly how to breakdown the cost, because the bouquets, bouteneers, corsages and other items are all being made with the same supplies. After all silk floral was purchased however I spent maybe $60. I will get Bouquets for 3 bridesmaids, 1 bride, 1 MOH, and 1 to throw. PLUS bouteneers for: 3 dads, 3 brothers, 1 bridesman, 4 groomsmen, 2 ringbearers, 2 jr ushers and 1 officiant. Corsages for 2 moms, 2 grandmas, 3 sister in laws, 2 train carriers, and it looks like I will have bunches of leftovers. So you do the math.

Friday, September 3, 2010

Votives

For our tablescapes, I got some shortish wine glasses, I will fill them with AquaGems and a floating candle. Around the glass on the table will be some votive candle holders, and maybe some glass rocks.
I got 11 votives from a past pink/orange bride on craigslist she had them decorated like this:
With help from my DIY fairies, (MOH and Aunt of the Bride) we gently ripped the pink flowers and black ribbon off of the orange paper.

Then we covered the little tear spot with a white scrapbook daisy sticker. the middle of the daisies were green/yellow so we popped little blue rhinestone stickers in the middle of them. (seen on the left, below) I had also found some blue and orange paper daisies as well so some of the votives have stickers and some have the paper flowers and some have both. (shown also with rhinestone sticker, on the right, below)

Because I need quite a few more than I got from her, I bought very similar votives in glass jars at Walmart.
While looking for some decorative blue paper, I thought about how I had to cut strips off the edge of the invitation cards to make them fit better with the invitations. And I had not yet recycled the scraps. Having precut strips of paper made the decorating process go faster. I just dabbed the end with hot glue, wrapped it around, ripped the paper to fit and glued the other end, I hid the seam with the flowers. on some, you can see that we added a contrasting ribbon as well. To bring some purple into the tablescapes, we did some with purple ribbon instead of paper. (shown at the right end, below)
Price breakdown:
votives from craigslist: $5.50 for 11
votives from Walmart: $12 for 24
blue paper from recycling: free
hot glue from craft supplies: already owned and who knows when i would have used it again
daisy stickers: used less than 3 sheets, each was $1
blue rhinestone stickers: used way less than 1 sheet which was $3
paper daisies from Party Depot: used less than 2 packs, each was 3.99
leftover ribbon from other projects: already included in other items price breakdown
grand total of $31.48 / for 35 votives = $0.90 each (a little more than I would have hoped, the paper flowers were the biggest splurge) and I have bunches more paper flowers, daisy stickers and rhinestone stickers to use on other things.
Afterthought: I really hope to be able to sell the votives to another bride (or someone) after the wedding. I would hate for them to clutter up my home or be in a landfill somewhere.

ETA
I have used these same votive holders multiple times since. I undecorated them and redecorated them for my brother's wedding, and for a bridal shower too!

before i found some rainbow stickers 

shown on corner of table with rainbow sticker. That is the cupcake tree from my wedding repurposed too! more about that here

some had simple pink ribbons and some had just a butterfly sticker, 


Have our cake and eat it too!

In liu of favors, which in my opinion are often a waste of money, time, energy, and resources, we are offering the option for our guests to take home the extra cupcakes in little to-go cups.

(all you need is LOVE... and cake! )
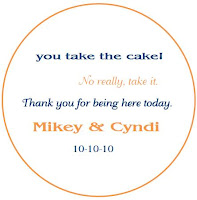
I designed 5 different lables so they wouldn't all be the same. Kinda like the hot sauce packets at Taco Bell


(have our cake.... and eat it too) (thanks for making our day sweeter)


(how SWEET it to be loved by you...) and my fave: (you take the cake! No really, take it.)

(the colors on these images arent quite right, the orange is more orange)

The cups and lids came from a local fastfood restraunt supply store Cash N Carry

I had the lables printed on sticker paper (also known as full sheet lables) at Staples. They werent going to print them for me, they said that the machine gets too hot and it can make the stickers peel and jam in the machine, but had had such a bad time with Staples, the girl took pity on me and offered to try it. between each sheet, it took a moment to get them ready for printing, so the machine had a chance to cool down. So my tip would be to either print at home, or find out ahead of time if the printing place you go to can handle sticker paper.


My wedding craft fairies cut them out using a Fiscars shape cutter and the circle template.
(photo courtesy of google images and vickie)

the price breakdown:

the cups came in a package of 50 for 5.95
the lids were 50 for 3.99


I already had some full page sticker/lable sheets. If I didnt have them, I would have printed on regular paper and used my xyron, because sticker paper is expensive, I had gotten the paper years ago from my employer for a project where I didnt end up using them, so free to me.


I was able to fit 15 lables per page and printing was only $0.49/page at Staples. I printed 5 pages, so 2.45 total.


for all they cost $12.39 for 50 cups, less than 0.25 each.


Afterthough: Since we are hosting Thanksgiving the month after the wedding, any of the cups that arent used can be repurposed for Thankgiving leftovers rather than using ziplock bags or paper plates. In fact I like that idea so much, I might pick up another package of the containers just for leftovers.