Saturday, August 14, 2010

I wanted to Staple's her feet to the floor!

Printing the invitations and rsvp cards was such a headache!

This post is long only for the purpose of venting, so scroll down for the short version.

First, I called Kinkos (FedEx Office) and was quoted about $30 for 100 color invites.
then I got there, and they said, "no its $.59 each page", which would be $59 for the invites + half that for the RSVPs. Also, he wouldnt be able to print me a proof for about an hour. I decided to call other printing places instead.
Officemax quoted me .49 / page, so overall $15 less than Kinkos. Maybe. Thanks to Google Maps, I realized that Staples does printing also. (And I am always looking for an excuse to go to K station anyway, I thought while they print them, I can go by Michaels.) Over the phone, the girl said they would be 2 for 0.49. because the cardstock I was bringing in was 5.5X8.5. So half the price of Officemax and even less than half of Kinkos.
After arriving at Staples, I learn that the price was misquoted to me, but the manager who was assiting in the copyprint center said that they would honor the price today but for future reference, it doenst matter how big the paper is.
So the copyprint associate who I had spoken with over the phone started working on printing a proof. I could tell off the bat that she didnt really know what she was doing, but for half price, I was willing to be patient. She was in training and even had to ask another associate how to find my memory card files in the computer.
After multiple black and white copies printed on her own paper, she prints a color version. The orange shadow, was yellow. So I try to adjust the color on her computer, but they have a different version of microsoft Word, so that doesnt work. Uhg, so we decide to just go home and adjust the color and come back another day.
Before we left I asked the associate if I would get the price she quoted me, she said, no I thought you would be getting 2 images per page, but these will be $0.49 each, the rsvps would be 2/49 (because i would have had to cut them in half anyway) GRRRR.
I decide to just try printing at home, because even a new ink cartridge for my printer (which I may not even need) wouldnt cost half of that.

So at home, I adjust the color, and do a color trial mock up with my clip art in several versions of orange, then went to go get my printer out of the garage, where its being stored until my apartment is finished.
I cant find it anywhere. Not in the garage, not in the attic, not in the house, not in the new storage space. Not in a boat, not with a goat, not here not there not anywhere... GRRR
The next day, Mikey helps me look and we cannot find it either!?!!?
So I decide to try to print it on Mikeys printer. I printed one and chose which color we liked best. Then after spending way too much time playing with settings, I couldnt get the printer to let me set a custom paper size. And i couldnt trick it by saying the paper was 8.5x11 and just printing on the top half, the paper jammed. GRRRR.

So I call Staples and speak with a manager, I explain what I was quoted originally and why, because the sheets were have the size of a standard paper. She agrees to honor the original half price quote, but she doesnt think that their machines can print on such a small paper. I explain that the manager who had agreed to honor the price the other day, another associate and the one in training all saw my cardstock and no one (of the 3 of them) said it would be a problem at that time, so she agrees its probably fine then.

I get to Staples, and a different associate is working and doesnt think they can print on small cards. But she is willing to try. After trying to no avail to change the printer settings, she calls another manager who says there isnt a way, the machines arent designed for small pages, they will get jammed in the printer. I am amazed that my $30 Walmart printer can handle it but theirs cannot. The manager offers to print 2 images on cardstock and cut them in half, so it will be what I want, kinda, but not use the the fancy invitation kit, I was so happy to have found on clearance, was worthless, except I will use the envelopes. (I also ended up using the rest of the peices for place cards and cupcake labels)
Staple's price on printing on their cardstock is about $0.50 more per page. I think, I bet its way cheaper to buy a ream of cardstock, and have them print on that instead, and it was. I got 250 sheets of cardstock (their smallest package, way more than the 75 I needed) for $15 and gave her the go-ahead to do a proof for me.
After approving the proofs, we can go get us some Jamba Juice while we wait.
I decided to cut them myself because the image ended up being a little smaller than I thought, and I wanted to control how I cropped them.
So because I was able to have 2 images printed on each card, I got the 2/$0.49 price, I just also had to spend the $ on cardstock. I will be able to use the rest of the cardstock for other things, and hopefully I will find my printer eventually and I can use the rest of the cards for the baby announcements or something.

I was happy with one part of the printing. The manager said they couldnt print my favor lables, because the machine heats up the sticker paper and it can come apart and jam up, but the associate felt bad for me, so she said its only a few pages and she is willing to try. She had to adjust the image slightly so that printing wouldnt cut of the edges of some of the labels. She was very nice about doing that. Then she printed them, I only needed 1 of each, but all of them needed to be tweeked a bit. They came out great, the machine didnt jam up or anything. I figured that the machine had a chance to cool off between pages while she tweeked each one.

Long Story Short:

  • Dont count on being able to get smaller than standard pages printed professionally, check first.
  • dont believe what they tell you over the phone, even when you give very specifically detailed information about what you need.
  • and dont get your heart set on something, you may find its easier to give up the idea than to stress of how it just wont work.
  • dont expect to get things done the first time, or in a timely fashion, better to assume it will cause a headache, so hopefully you will be pleasently surprised.
  • dont wait until the last week to get things done, it will only add to the stress.

Wednesday, August 4, 2010

invitation supplies are all set out for the invitation fairys to come in the middle of the night tonight!

so i posted some invitation stuff on this post but i wanted to follow up now that i have all the supplies.

soon after we got engaged, i found some wedding items on clearance at JoAnn's. including Wilton complete invitation kits in "Keeping with Tradition" the kits come with the main invite card, and rsvp card and envelopes for both. the kits were 3.97 each.


i designed this to be printed on the cards, turned landscape instead, to be different


today, i went in to craftwarehouse to try to find some paper to back the kit cards to get a look similar to lovebuddies's invite.


based on the size of the cards, i needed 8.5x11, and lo and behold, craftwarehouse was having a sale on paper, 8 for $1 and 20% off of everything. $10.23 for all the blue backing paper.


i also love the ribbon on the side of the invite, and although i had bought a bunch of different ribbons on sale at michaels a way back, i wanted to be sure i had plenty, and the ribbon i found that i liked was 25yds for $0.80 (after 20% discount) i only needed 3 spools.


another element i really liked was the belly bands that squirrly did on her invites.


i got some orange cardstock also for a backing behind some white cardstock for the buckle thing on front of the belly band.


the plan is to print each of the guests' names on white cardstock and cut out a square or circle just smaller than the orange peice.


so i am very proud of the total cost of my invites. after hearing about some invites costing several dollars each, i wanted to keep mine under $1 each.

here is the breakdown: (has been updated since original post)


invite kits: 3 x 3.97 = 11.91
blue cardstock: 115 sheets at 0.09 each = 10.23
orange cardstock: 20 sheets at 0.09 each = 1.72
sheer silver ribbon: 3 x .80= 2.40
Printing at Staples 50 pages of invites+25 pages of RSVPs = $36.75
cardstock $14.99
double sided tape: $2.10
for 100 invites (includes extras) = 80.10
<$0.81 each invite. not counting postage.
we are going to save postage by hand delivering some invites, and doing website and phone rsvps.

I have lots of extra cardstock, which I will end up using for other things, possibly programs, or nwr stuff. I also wont likely use all the tape or ribbon. I was unable to use the invitation cards and rsvp cards that came with the 3.97 kits, only the envelopes, but I expect to use them for Thank You's and maybe menu cards.

Monday, August 2, 2010

cupcake trials

so after I decided to do cupcakes instead of a traditional wedding cake, my darling fiance informed me that we must taste a bunch of flavors. (he does have a sweet tooth at times)

The cupcake tree I found can hold up to 300 cupcakes, we will make possibly more than that and have them on the table around the tree. I want there to be plenty, and even have leftovers for guests to take home in to-go boxes we got.

I thought of doing cupcakes in just a few basic flavors and decorate them all in wedding colors, but I figured I would get enough wedding color decor when I decorate the stand and when I started looking at cupcakes I liked the ones that had little clues on the frosting as to whats inside.

so I thought of some flavor ideas and decorating ideas and here are some of the ones i came up with:

almond joy 1 chocolate cake mix with almond extract added, 1 white cake made with coconut milk and coconut extract added. topped with shredded coconut and a roasted almond. first, I put some chocolate batter in, then some coconut batter and swirled with a toothpick.

the frosting is a can of chocolate that has almond flavored syrup mixed in.

I can also make some of these Mounds by waiting to add the almond extract to the chocolate until half of them are made, then top with all coconut and no almond. because some times you feel like a nut, and sometimes, you dont.


raspberry lemonade 1 lemon cake made with lemonade concentrate instead of half of the water(i tried with all concentrate and it was on the strong side) and 1 lemon cake made with half lemonade concentrate, mashed fresh raspberries (or chopped frozen) and some raspberry jello powder (or kool-ade) mixed in (dont forget the eggs like i did btw).
i put the lemon cake batter in the cups first, then topped with some raspberry cake and swirled with a toothpick. (the seperate color/flavor part can be skipped but i wanted them to look fancier than a solid color) they're topped with lemon frosting (from a can), fresh raspberry and a lemon peel or lemon candy and a sprinkling of more jello powder

this can be done with only 1 mix if you fill all the cupcake cups halfway with lemon then add some raspberry stuff then finish. i was making 4 dozen anyway so I used 2 boxes.

for testing, I made these for my late uncle's celebration of life that we held instead of a funeral. I opted for the lemon drops because they were my Grammies favorite candy before she passed away 22 years ago (and every candy is uncle Keith's favorite). Also, they were easier to work with than a lemon slice or peel in the mornings while pregnant.

Everyone raved about how yummy these were, but people suggested that for the wedding, to do either do a gummy candy, or lemon slice. the lemon drop was too much, to have to suck on, in addition to eating the cupcake.


strawberry cheesecake strawberry cake mix with chopped strawberries mixed in. frosted with cream cheese frosting and top rolled in crushed graham crackers and a strawberry slice.
I decided to frost the cupcakes with the same as the filling, it was so much yummier than the canned frosting.


for the filling, I mixed softened cream cheese with powdered sugar is all. to do the filling, I poked the handle end of a wooden spoon in the middle of the cupcake, then using a "pastry bag" (corner cut off ziplock baggie) to pipe the filling into the hole.


i also made a full sized cake the same way, but poked bunches of holes all around the cake.


i have yet to try:

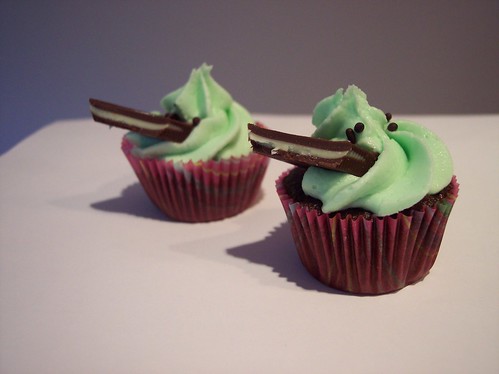
andies mint 1 chocolate cake mix with mint extract added in and possibly andies mint chips mixed in also. one white cake mix with green food coloring and mint extract mixed in. frosted in chocolate(or green mint) frosting and sprinkled with andies mint chips or a full or half mint.

photo courtesy of adam on flickr


chocolate covered cherry chocolate cake mix made with cherry pepsi instead of water and possibly chopped cherries mixed in. filled with cherry pie filling, like 1 cherry in the middle. frosted with chocolate and a chocolate covered marachino cherry on top.


chocolate frosting, unlike this photo i found on theknot
(ETA I ended up not doing this one)


cafe java yellow? cake mix made with very strong coffee instead of water, java chips mixed in, frosted with whipped cream frosting and some coffee beans and cinnamon on top. might look up a better recipe for this

ETA I ended up mixing Via powder in the mix and using very strong Via coffee instead of the water in the cake mix.
photo courtesy of cupcake carrie on flickr


oreo cookies and cream i will look for a recipe for this one, probably just a white cake with oreo crumbs/cream mixed in, topped with a cream frosting and a mini oreo.

ETA I ended up putting half of an oreo at the bottom of the cupcake liner)

i did mini cheesecakes for our annual Daytona 500 party, because oreos look like tires. cheesecake is a lot of work though, so i will stick with cupcakes.

photo courtesy of theknot


Mikey also suggested doing "like a rainbow cake with lots of colors, because it would look neat" i said "like funfetti cake?" he didnt know what funfetti was. How can i marry a man who doesnt know what funfetti is? so i showed him the box at the grocery store and he said that is exactly what i had in mind.

recipe for homemade funfetti cupcakes here

(ETA I ended up doing box funfetti cake with solid blue and orange sprinkles to go with the wedding theme, I considered using the homemade recipe with just orange and blue but liked the rainbows of color.

we will also have just basic chocolate and white cakes for the boring or less courageous guests. (ETA we also had Gluten Free and Sugar Free cupcakes.)

Sunday, July 25, 2010

must do pics


and from Veronabrit


and these from team136


a list in progress started from a list on Ela's planning bio

Groom
- with all groomsmen/officiant
- with each groomsman
- with his parents
- with Annie (bulldog)
- with flower girls/ring bearers
- with all bridesmaids

Bride
- with all bridesmaids/bridesman
- with each bridesmaid/man
- with her parents
- with grandma Lenna
- with entire immediate/extended (with and without siblings inlaws) family
- with flower girls/ring bearers/train carriers/ushers
- with all groomsmen/officiant

Bride & Groom
- with entire Wedding Party
- with each set of parents
- with both sets of parents
- with both immediate/extended families (annie included)
- with flower girls/ring bearers/train carriers/ushers
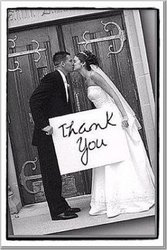
- "Thank You" parasol or sign
- signing the marriage license
- random artistic shots

Details:

Getting Ready
- bride's gown hanging on a monogrammed hanger
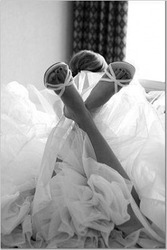
- still-life shots of the bride's shoes, jewelry, etc.
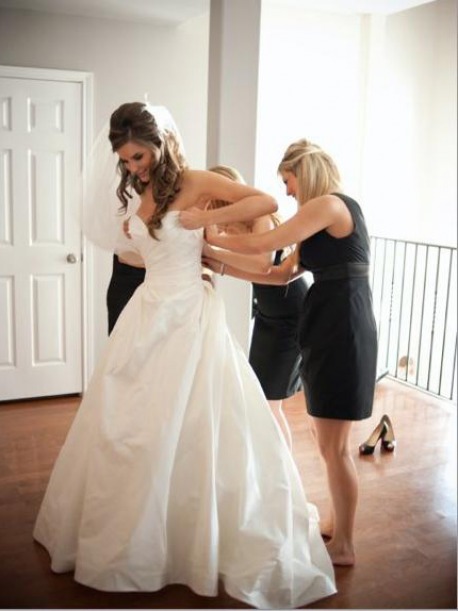
- mother and bridesmaids helping with wedding gown
- candid shots of bridesmaids getting ready
- groom getting ready with his groomsmen
- groom and groomsmen putting on boutonnieres
- groom's mother helping with the boutonniere
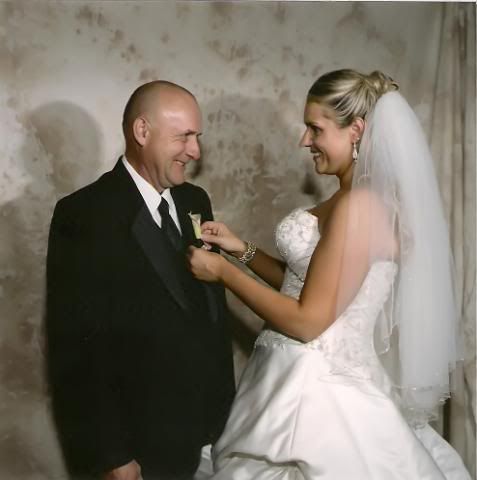
- bride putting bouts on dads and brothers

Items (at the ceremony site)
- wedding invitation, program, directions cards
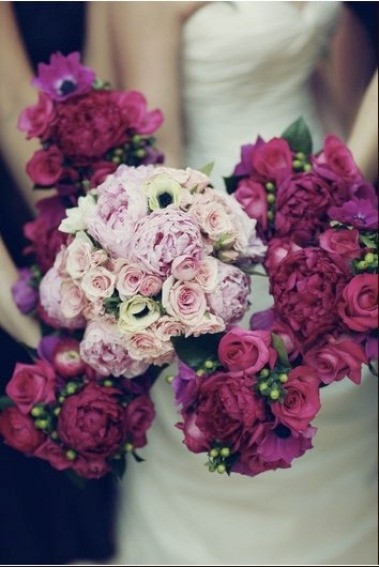
- detailed shots of the bride's and bridesmaids' bouquets
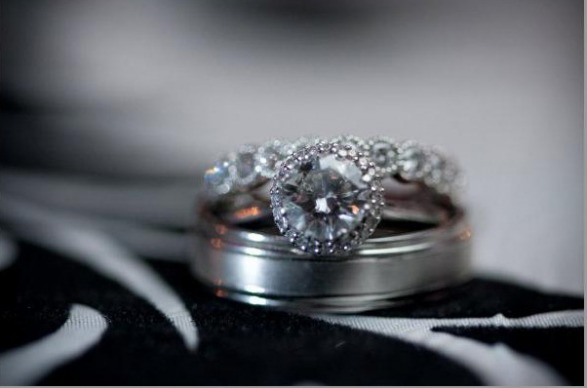
- rings (ring boxes with ring bearers, on the invitation/program, on newspaper, brides inside of grooms etc.)
- picture down the aisle
- close up of aisle runner, and altar arrangement

Ceremony
- exterior and interior shots of the ceremony site before guests arrive
- pictures of mothers and grandmothers being seated
- groom entering with groomsmen
- close-up of groom's expression while waiting for the bride
- bridal party walking down the aisle
- flower girls/ring bearers walking down the aisle
- bride with her dad before walking down the aisle
- close-up of bride just before she makes her entrance
- bride and her dad walking down the aisle
- groom's face when he first see bride walking down the aisle
- bride's brothers giving her away
- bride and groom at the altar
- both sets of parents watching the ceremony
- wide shot of the altar, from the guests' point of view
- wide shot of the audience, from the couple's point of view
- shot from the balcony
- close-up of bride and groom as they recite their vows
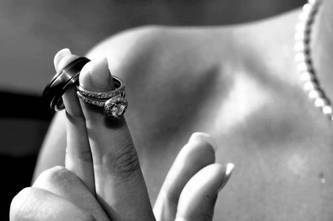
- close-up of bride and groom's hands as they exchange rings
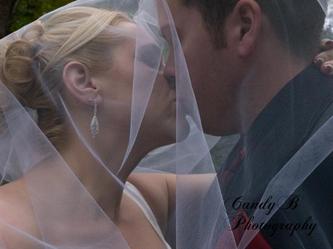
- the kiss
- close-up of newlyweds immediately after the ceremony
- pictures of families and bridal party walking back down the aisle
- candids during receiving line
- bride and groom leaving the ceremony site

Reception
- decorations
- centerpieces and table decor
- guest book and pen set-up
- sweetheart table
- card box, gift table (after filled)
- cake and cake table set-up
- food set-up
- exterior and interior shots of the reception site
- guests arriving and signing the guest book
- close-ups of friends and family making toasts
- bride and groom speaking with guests
- bride and groom's first dance
- bride and groom cutting the cake/toasting
- bouquet toss/garter toss
- lots of candids of people mingling
- bride and groom hugging their parents

you are cordially invited to look at this post

this was much less work than i thought it would be. i simply googled invitation wording and came across this website which has like a million samples. i copy/pasted a bunch into a word doc and Mikey and i went over them together, tweeked this one a bit and agreed we like it.

i considered doing die cuts for the flourish on the sides, but after finding this swirly curly thing and being able to edit the color. i think it would be easier to have it printed on the actual invite.
the swirly was solid black with no shadow, i really havent used microsoft word for image editing before and i kinda just figured it out as i went. i doubt i could recreate the steps though.


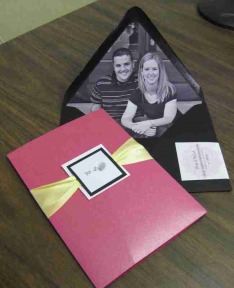
i am thinking of something like knottie lovebuddies did and attatch the print-your-own-kit invite card onto a cardstock bi-fold card to add something more fancyness to it.


i like the ribbon on the side of card also, i can slip the information card under it.


i wanted to include just our first names somewhere on the invite, i think i can do a little card on the front of the ribbon, like a belly band buckle type thing.


i also love the envelope liner that knottie squirrly did with one of her engagement pics. she gave me another idea for the belly band buckle thingy, by putting the invited's name on it instead of using inner envelopes. the kit i bought didnt come with inner envelopes so this is a good alternative. my handwriting is not good enough for this so perhaps i will print the names on printable cardstock and use my handy dandy paper cutter after printing....


~

invite costs so far: $12 Joann had some Wilton "Keeping with Tradition" invite kits on clearance for $4 (normally $25) a box not long after we got engaged. they only had 2 boxes of white. i bought both and a box of ivory so i would have plenty to test and work with for prototypes. each box has 50 invites/ envelopes / rsvp cards / envelopes and 3 tester sheets. its possible that i will have to pay full price for another box of invites or send some out in ivory. i am ok with that.
~~~
SOOOO i thought i saved the invitation but i hadnt saved it after i got it how i wanted so i had to redo a bunch of it and this is how it turned out the 2nd time around.
i like the swirlys mirrored rather than flipped again and the & and 101010 orange better. i also bolded the words so they would be closer to the boldness of the swirlys.

( just realized the screen shot i took to use paint to censor out our names/address shows the grammer checkers underlining marks!, it didnt when i saved as pdf for printing)

just got off the phone with kinkos and printing 100 invitations will only cost $30ish thats sweet!

next step, find 8.5x11 cardstock for the cover like lovebuddies did above... already got a bunch of ribbon on sale at Michaels a while back.

Thursday, July 22, 2010

Shirts and Hangers, check!


So I always thought that it was awefully silly to spend so much money on "bridesmaid" tshirts, $23 each, really? Like they will really want to wear them, right? Well shopping with my sister, my MOH, she like the idea and we found some iron-on silvery letters on clearance at Joann's. so I bought them. I needed 6 sets but they only had 5 of one style letter and 1 of another, so i decided that the MOH can be slightly different from the others. She liked the idea of being special. I told her she was already special to me. Short bus special, lol.

The personalized hangers for their gowns was another silly idea that I fell in love with. Read an inspiration blog post here.

I was able to make 5 shirts plus hangers for $32.32 so about $6.46 each person. I also had enough letters leftover to make myself a hanger and a shirt later if I find a shirt that will fit the pregnant me for a while.

I am opting not to include a step-by-step tuturial because I would basically be copying the instructions on the back of the iron-on letters package.
One tip though, it says to move the iron back and forth, not a great idea, the letters shifted slightly when I did that, it worked just fine to hold the iron in one place. For the rhinestone letters, I used the side of the iron without the steam holes so that the rhinestones wouldnt be bothered by the holes. not sure if this was nessesary...
Price breakdown:
I thought about doing tank-tops or camis but the wedding is in October in Oregon, and not all of my ladies will want to wear tanks. these shirts are large enough to wear a long sleeve shirt under also.
The 4 girls' shirts were $1.50 each on clearance at Wal-Mart. They were originally $8, then clearanced to $5 then $3 then $1.50 they are just a plain thin tshirt. Now, for my bridesman (yes he gets one too!) I bought a 3 pack of Hanes tees for $5.50.

subtotal: 4 shirts x $1.50=$6 + pack of 3 for $5.50 = 11.50
the silvery glitter iron on letters shown were $1.97 for the ones I used on the BM shirts, the MOH letters were $2.97, down from $9.99.

subtotal: 5 x 1.97 + 2.97 = 12.82
I bought 2, 5 packs of velvetty fuzzy hangers. My inspiration was done with wooden hangers, but Wal-Mart didnt have white wood hangers, and when I saw the velvety ones, i realized i didnt know if the iron-ons would even work on wood, and the silver would stand out better on the black. I opted to do all 3 initials because I have 2 L's and the letters were small enough to fit all 3.
They worked great on the velvet, just follow my tip about not moving the iron.
I wanted to have extras in case I messed one up, if I didnt mess any up, I figured I could return the 2nd pack., then I realized it was worth the extra $4 for me to have one too.

subtotal: 2 packages of hangers were $8

Grand total: shirts $11.50 + letters $12.82 + hangers $8 = 32.32 / 5 in the bridal party = $6.46 each.

And I have a hanger for myself, bunches of iron-on letters left, 4 hangers and 2 Hanes tshirts leftover. I have some ideas for the extras... I might iron-on my 4 flowergirl's initials or names onto ribbon for their baskets. or try to do "I DO" on the bottom of my shoes.

Monday, July 19, 2010

Napkins!

so here are the napkin/silverwear rolls.
I thought wrapping the silverwear would make things prettier and more convienent for our guests.


here is my supplies list.

~the ink was from Joann's its a la mode brand dye ink pad in royal blue. I also got an orange one but i dont know what brand it was. The blue one i got at Michaels kept smearing, so I will use it for something else.
~the stamps were on clearance at Joann's I wasnt sure what I was going to use them for but they were only $4 and I was in a shopping mood. There are bunches of wedding quotes but we only really liked 2. the one we stamped in blue says "to love and laughter and happily ever after"
~ I already owned the stamp block but I have used the ink pad cover before when I was using more stamps than blocks I owned. So its not nessesary to buy the block. Also, I have seen the blocks in the dollar bins too.
~ I have used 2 10-yard spools of ribbon so far, i have only made about a quarter of the napkins though. the ribbon spools were on sale for 0.20 each at Michaels
~ The little charm things were included in a lot of wedding stuff I bought from a woman on craigslist. Everything I bought from her was from the Dollar Tree and it worked out that i paid .67 each item and each package of 24. What I got from her wasnt enough however so i picked up a few more packages at $1 each.
~The napkins and plasticware were from Cash&Carry

now for the steps:


stick the stamp to the block and ink, press firmly to the napkin, without rocking back and forth, then let it dry for a bit.

I found the best way to stack the silverware was knife, fork, spoon. lined up on the center of the diagonal.


fold up the bottom corner then the right corner, like a burrito.


then roll somewhat tightly, but keep it pretty. then I cut a length of orange ribbon, tied in a knot on the front of the roll.

these are the little charms i got from craigslist/dollar tree. they were tied on with the knot in the back. they came pre-tied together and on a longer ribbon that fit perfectly around the roll. initially I thought I would only use these, to save time and money, but they needed some color, and I wanted to incorporate our wedding colors so I added the orange ribbon. its worth the extra time and (very little) extra money.
When I am half way done, I will switch to orange ink with a blue ribbon. Then alternate them on the tables. This will do 2 things: A: dress up the table and 2: be more convienent for guests not to remember or carry them through the buffet line.
COST BREAKDOWN:
ribbon/ring things bought from a girl on Craigslist 6 packs of 24 $0.67 each = 3.99
ribbon/ring things bought from dollar tree 4 packs of 24 $1.00 each = 4.00
napkins bought from Cash and Carry 3 packs of 125 for $ 1.79 each = 5.37
ink pad for stamps from JoAnn's =2.79
stamps bought at JoAnn's on clearance 3.97
1/4" ribbon spools bought at Michaels 8 x 0.20 = 1.60
ink pads for stamps bought at Michaels 2 x 4.19 = 8.38
$30.13 for 350+ dinner sized napkins and I have ink and stamps that I can use for other things.
we are only going to roll up about 200 napkins, the rest will be extras.
This is the cost for just the napkins, the plasticware isnt included in the price, but they came in packages of 100 for $3.67 at Cash and Carry